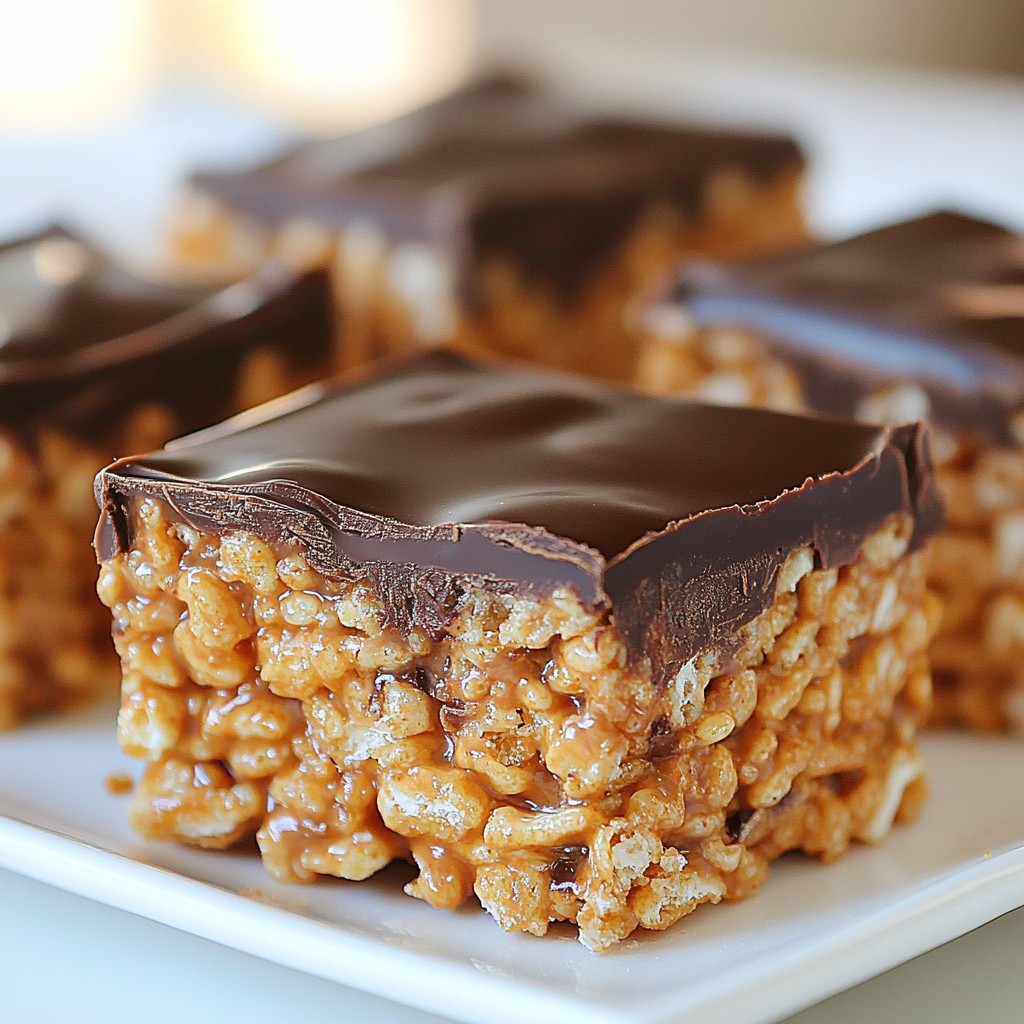
Indulge in the rich, creamy goodness of Chocolate Peanut Butter Rice Crispy Bars! These delightful treats blend crunchy cereal, smooth peanut butter, and luscious chocolate for a snack you won't forget. Whether you're a busy parent or a sweet-toothed adult, I’ll guide you through each step to create this simple recipe. Get ready to impress your friends and family with a no-bake dessert that’s fun and easy to make!
Why I Love This Recipe
- Easy to Make: This recipe requires just a few simple ingredients and minimal cooking, making it perfect for quick snacks or desserts.
- Delicious Flavor Combination: The rich chocolate and creamy peanut butter blend together beautifully, creating a treat that satisfies sweet cravings.
- Customizable: You can easily adapt this recipe by adding nuts, dried fruits, or using different types of chocolate to suit your taste.
- Great for Meal Prep: These bars can be made in advance and stored, providing a convenient and healthy snack option throughout the week.
Ingredients
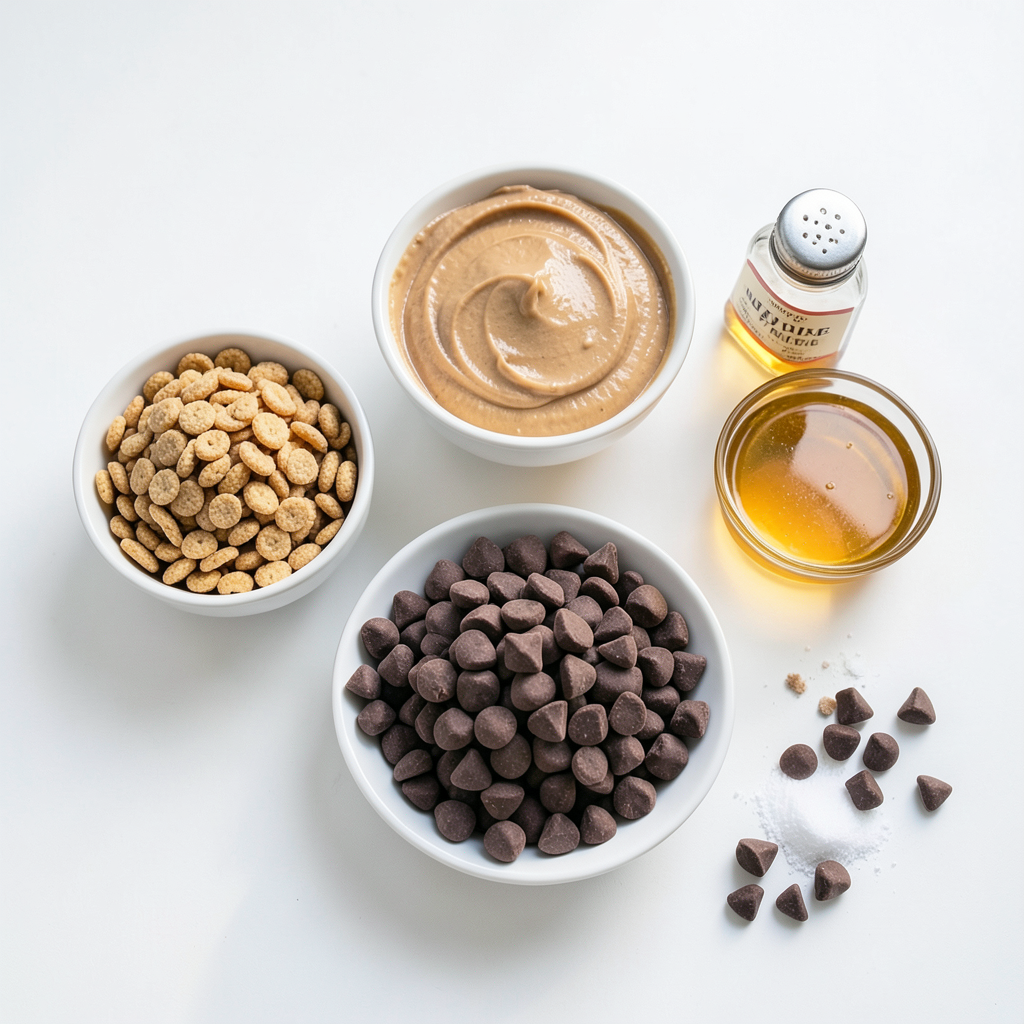
List of Ingredients
- 3 cups rice crispy cereal
- 1 cup creamy peanut butter
- 1 cup chocolate chips (semi-sweet or dark)
- 1/2 cup honey or maple syrup
- 1 teaspoon vanilla extract
- Pinch of salt
- Additional chocolate chips for topping (optional)
Measurements and Alternatives
When making these bars, I love using standard measuring cups. You can swap honey for maple syrup if you want a vegan option. Both work great. If you want less sweetness, use less honey or syrup. Try using crunchy peanut butter for a fun texture change. You can also mix in some chopped nuts for extra crunch.
Key Ingredients and Tips
Rice crispy cereal is the base of these bars. It gives them a light and airy crunch. The creamy peanut butter adds rich flavor and binds the mixture. Chocolate chips bring sweetness and depth.
Here are some tips:
- Use a good quality peanut butter for the best taste.
- Melt the mixture over low heat to avoid burning.
- Press the mixture firmly into the dish for firm bars.
- Chill them well to make cutting easier later.
These tips will help you create the best chocolate peanut butter rice crispy bars. Enjoy your time in the kitchen!
Step-by-Step Instructions
Preparation of Baking Dish
Start by lining an 8x8 inch baking dish with parchment paper. Leave some paper hanging over the edges. This makes it easy to lift the bars out later. Make sure the paper covers the bottom and sides well.
Melting Peanut Butter Mixture
Next, grab a large saucepan and set it over low heat. You will need to melt the peanut butter, honey, and a pinch of salt together. Stir it slowly for about 3 to 5 minutes. Keep mixing until the blend is smooth. Don't rush this step; it helps the flavors mix well.
Combining Chocolate and Rice Crispy Cereal
Once your peanut butter mixture is smooth, take the saucepan off the heat. Add the chocolate chips and vanilla extract. Stir until the chocolate melts completely and mixes in. Now, add the rice crispy cereal bit by bit. Fold it gently to coat each piece well.
Chilling and Serving Suggestions
Pour the mixture into your prepared baking dish. Use a spatula to spread it evenly. Press it down firmly to make a compact layer. If you want, sprinkle extra chocolate chips on top and press them in lightly. Now, place the dish in the fridge for at least 1 to 2 hours. This helps the bars set. After chilling, lift the bars out using the parchment paper. Cut them into squares or rectangles. Enjoy them right away or store in the fridge in an airtight container.
Tips & Tricks
Perfecting the Texture
To get the best texture, be gentle when mixing the rice crispy cereal. Fold it in slowly to avoid crushing the cereal. This keeps the bars light and crunchy. You want a nice balance between chewy and crispy. If you press too hard, they may turn out dense.
Customizing Sweetness Level
You can adjust the sweetness based on your taste. If you like it less sweet, use less honey or maple syrup. You can also swap honey with a sugar-free sweetener. For a sweeter treat, add more chocolate chips. Play around to find what works for you!
Common Mistakes to Avoid
One common mistake is not allowing the bars to chill long enough. If they're not firm, they will fall apart when you cut them. Another mistake is forgetting the pinch of salt. It enhances all the flavors and balances the sweetness. Make sure to line your dish well to prevent sticking, too!
Pro Tips
- Use Natural Sweeteners: If you're looking for a healthier option, consider using natural sweeteners like agave syrup or coconut nectar in place of honey or maple syrup.
- Experiment with Nut Butters: For a twist on the classic flavor, try substituting almond butter or cashew butter for the peanut butter to create unique variations.
- Customize Your Toppings: Feel free to add toppings like crushed nuts, shredded coconut, or dried fruit to the bars for added texture and flavor.
- Storage Tips: To keep the bars fresh, store them in an airtight container in the refrigerator, where they can last for up to a week.
Variations
Adding Nuts or Seeds
You can make your bars even better by adding nuts or seeds. Chopped peanuts bring a nice crunch. Almonds or walnuts can add a different flavor. Try sunflower seeds for a nut-free option. Just mix them in when you add the rice crispy cereal. This will make your bars tastier and healthier!
Using Different Chocolate Types
Switching chocolate types can change the taste of your bars. You can use milk chocolate for a sweeter flavor. Dark chocolate adds a rich, bold taste. White chocolate gives a creamy twist. You can even mix different types. Just remember to use the same amount as the recipe calls for!
Incorporating Other Flavor Extracts
Adding extracts can give your bars a fun twist. A dash of almond extract can make them unique. Mint extract can create a refreshing taste. You could also try coconut extract for a tropical vibe. Mix in just a teaspoon when you add the vanilla. This small change can make a big difference!
Storage Info
How to Store Bars Properly
To keep your chocolate peanut butter rice crispy bars fresh, use an airtight container. Place parchment paper between layers to avoid sticking. Store them in the fridge for the best taste and texture. If you leave them out, they might get soft or lose their crunch.
Shelf Life and Freezing Tips
These bars can last up to one week in the fridge. For longer storage, you can freeze them. Cut the bars into squares, then wrap each piece tightly in plastic wrap. Place them in a freezer-safe bag or container. They will stay fresh for about three months in the freezer.
Reheating Recommendations
If you want to enjoy them warm, you can reheat the bars. Place a piece in the microwave for 10-15 seconds. This will soften the chocolate and make the peanut butter creamy again. Just be careful not to overheat, as it can make them too gooey. Enjoy!
FAQs
Can I use natural peanut butter?
Yes, you can use natural peanut butter. It has a different texture than creamy peanut butter. Natural peanut butter is oilier and may cause the bars to be a bit softer. To fix this, add a bit more rice crispy cereal. You still get that tasty peanut flavor!
How do I make these bars gluten-free?
To make these bars gluten-free, you need to use gluten-free rice crispy cereal. Look for brands that say "gluten-free" on the label. This simple swap keeps your bars safe for those with gluten allergies. Always check labels to be sure!
What can I substitute for honey or maple syrup?
If you want to swap honey or maple syrup, try agave syrup or brown rice syrup. Both work well and add nice sweetness. You can also use white sugar, but dissolve it in a bit of warm water first. This helps it mix better in the recipe.
In this blog post, we explored the key ingredients and steps to make tasty treat bars. You learned how to measure, prepare, and chill your bars for the best texture. We also shared tips for customizing sweetness and avoiding common mistakes. Plus, we covered fun variations and storage methods.
Remember, with practice, you can create the perfect snack that fits your taste. Enjoy experimenting with flavors and making these bars your own!